|
Our basement bathroom was, for lack of a better word, atrocious. Floral wallpaper that you might find at your grandmother's lined all four walls and were peeling at the seams. Old vinyl flooring started to chip in some areas. The laminate blue counter top, shower and musty cabinets were all dated. BEFORE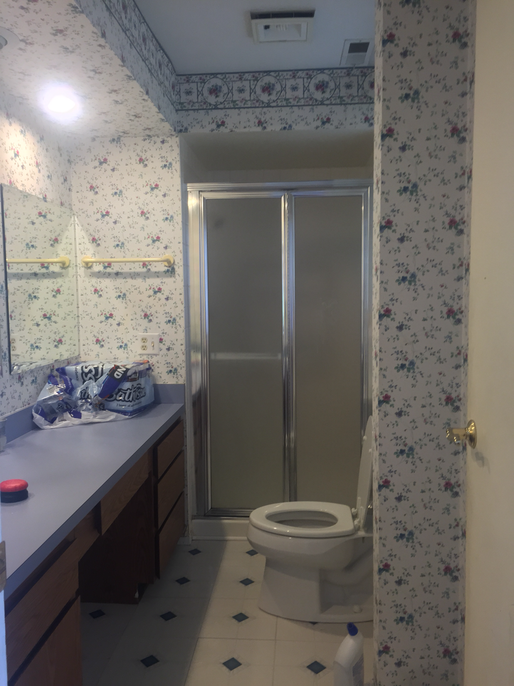 The original basement bathroom Since most of our house was redone, this had to get some lovin' as well...especially before finally opening our home to guests other than our immediate families. The laundry and garage still need to get done but those two rooms are usually off-limits so they weren't high priorities at the time. Wait til you see those rooms in a future entry! ;-) DEMOContractor: Vu Construction Like the main areas of our basement, we did a lot of it ourselves to save money but sub-contracted out for the heavy stuff. The only demo we did in that room was removing the wallpaper and cabinetry. My dad was still around and wanted to keep busy so I showed him how to remove the wallpaper. To strip the wall paper, you'll need the following... Tools needed:
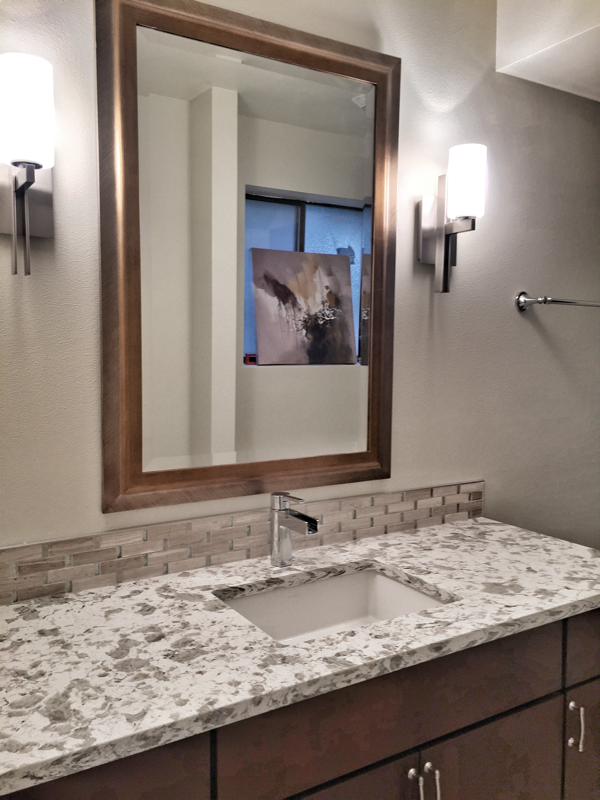
Then, we made a 1 : 1 solution to help strip it off:
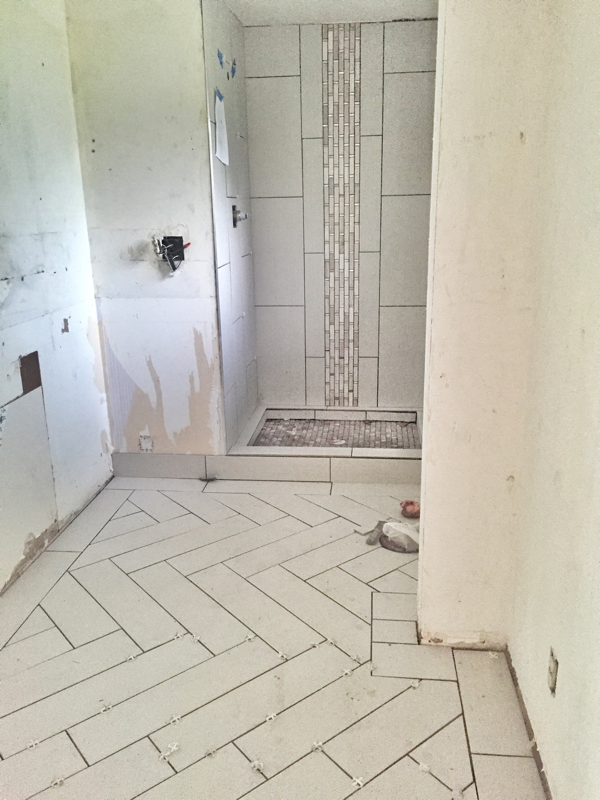
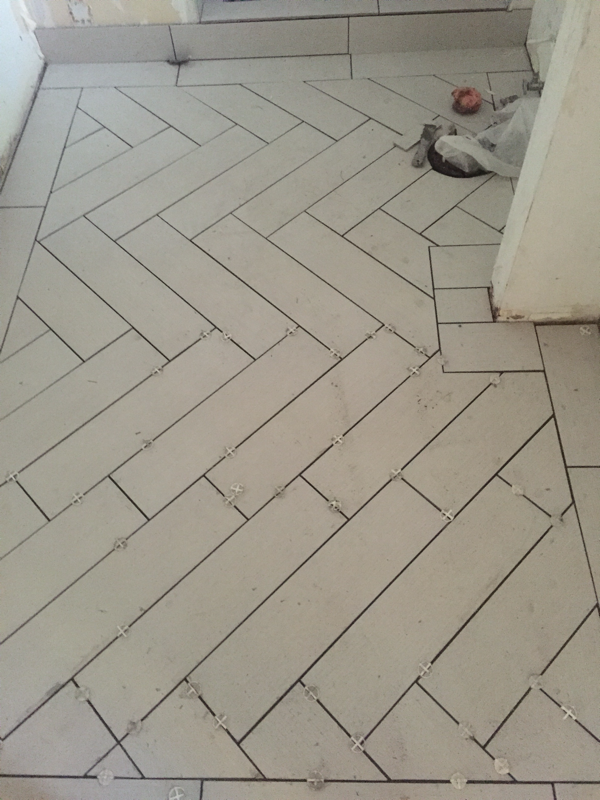
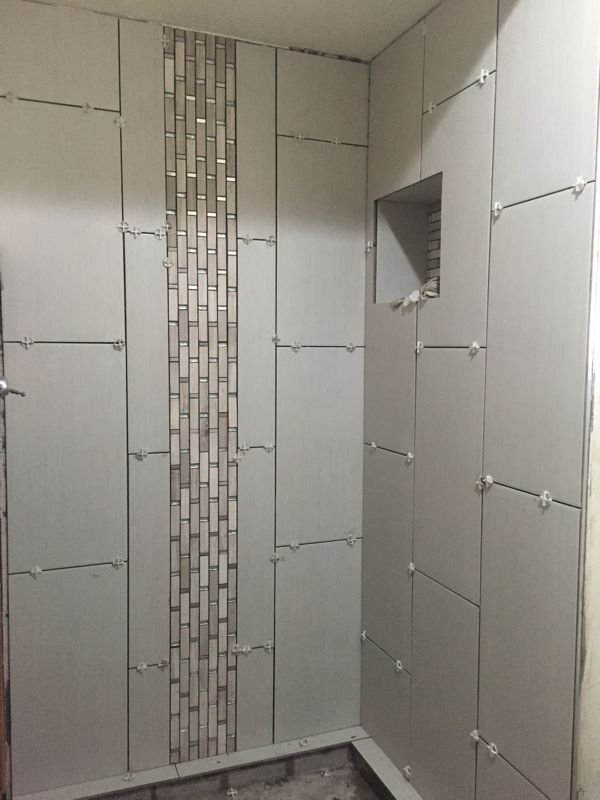
Scrape the wallpaper with the scoring tool by following its instructions to create punctures, then spritz the solution and let it saturate. Use the sponge to help spread the liquid around and seep through the holes. Wait about 10-15 minutes then rip the wallpaper off. You may need a spatula to get to the stubborn and hard-to-reach areas. When stripping the paper, we found what appeared to be mold coming through the walls. NOT GOOD. So, the contractor was notified to take care of the issue. 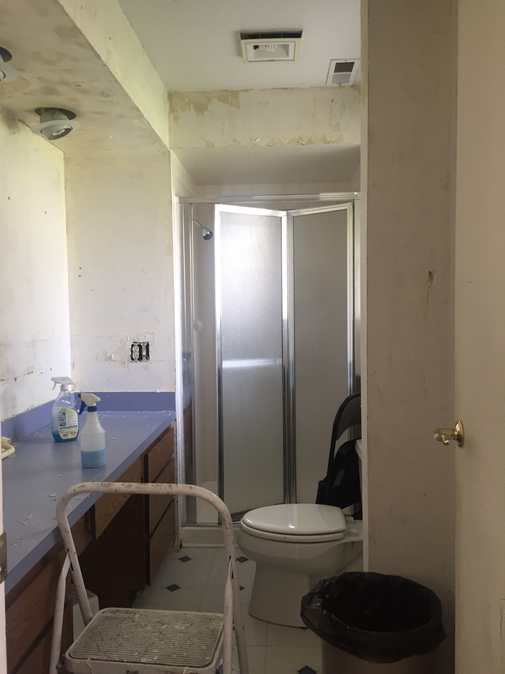 It's already looking better! INSTALLATIONWe went to Home Depot to pick up all the tile we wanted in coordinating colors. We found these new 4" strip tiles, which, I then had an "A-HA" moment...I always wanted herringbone floors so that's the pattern we went with. When telling the contractors, they had this look like, "are you freaking serious?" They didn't say that aloud but I could tell in their eyes. LOL. This was more labor intensive for them but it was worth it in the end. Looking closely at the tile, they have this subtle striated pattern but looks a bit solid with texture from afar. The mosaic wall tile in the shower have glass accents within them while the floor mosaic tile is a dark-ish marble. My husband thought for sure it would look bad... TIP for you: If you're going to mix materials, make sure there is a common element or color, and everything will tie in together at the end. Also, when choosing your materials, see them in person to touch them and compare the colors because the coloring may be "off" online. The only thing we took a chance with was the shower door, which, we bought on Amazon. We were relieved (and lucky) it fit perfectly. For the counter-top, we chose a very heavily patterned quartz. I hate to say that even I was unsure because it's on the busier side but I was pleased with the outcome. It didn't look too bad at all. Again, you can see that there are common colors between the counter top and tile back splash. 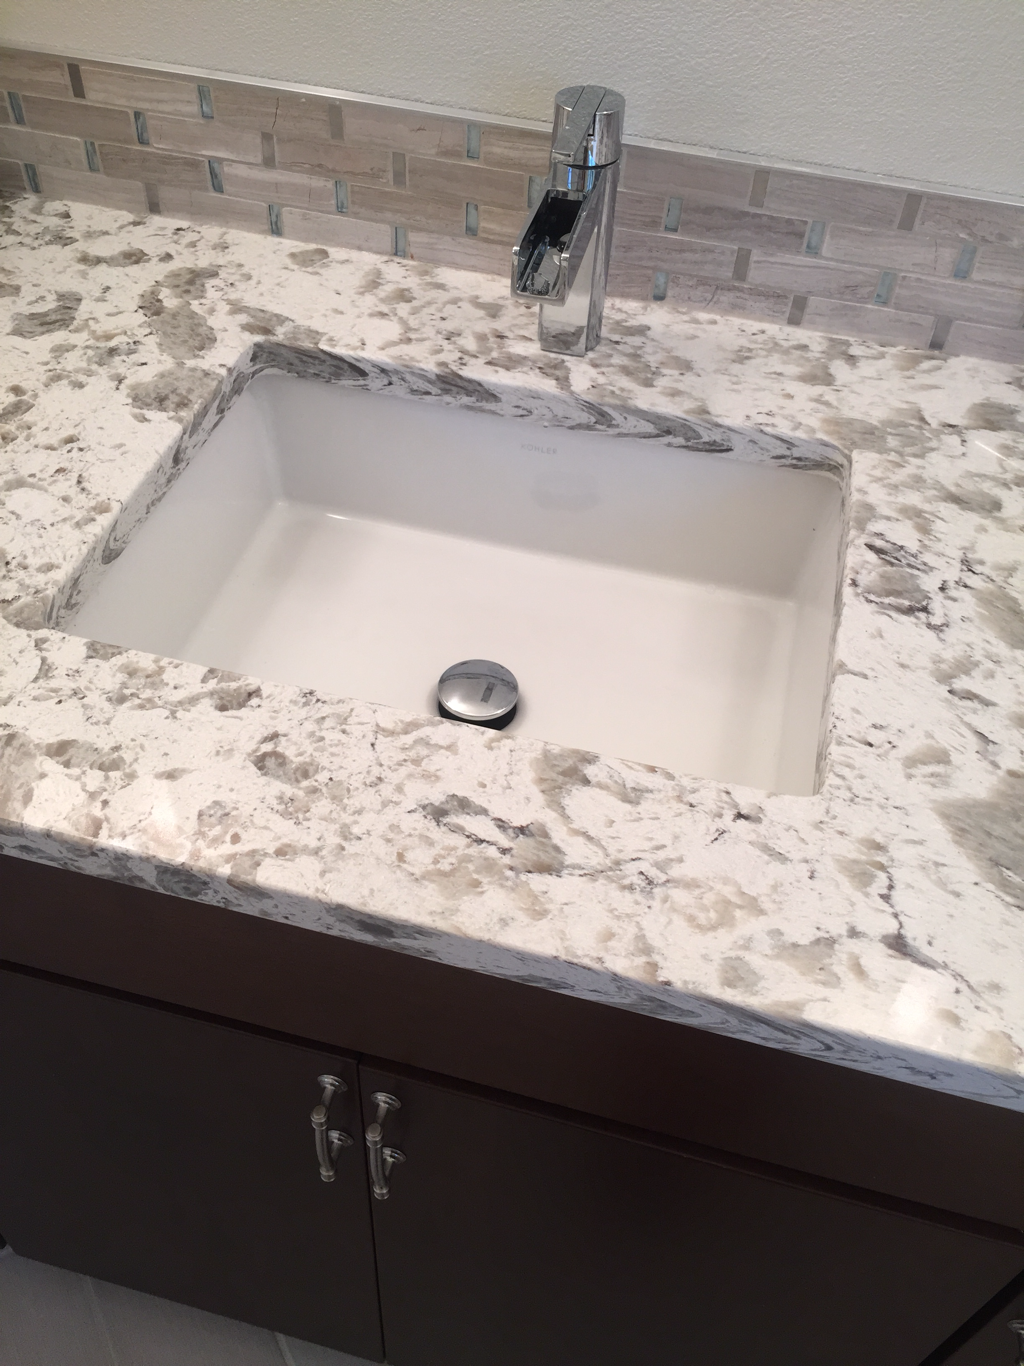 AFTERBelow is our finished bathroom. We wanted bright, open, and contemporary. I love that we were able to achieve that. Looking at it - actually, at almost everything in our home - really affirmed my ability as a designer. Still there are some things I would've done differently but, as always, I learn as I go. Everyone that has come through our home has complimented this bathroom and even some of my kids' friends say it's their fave. LOL 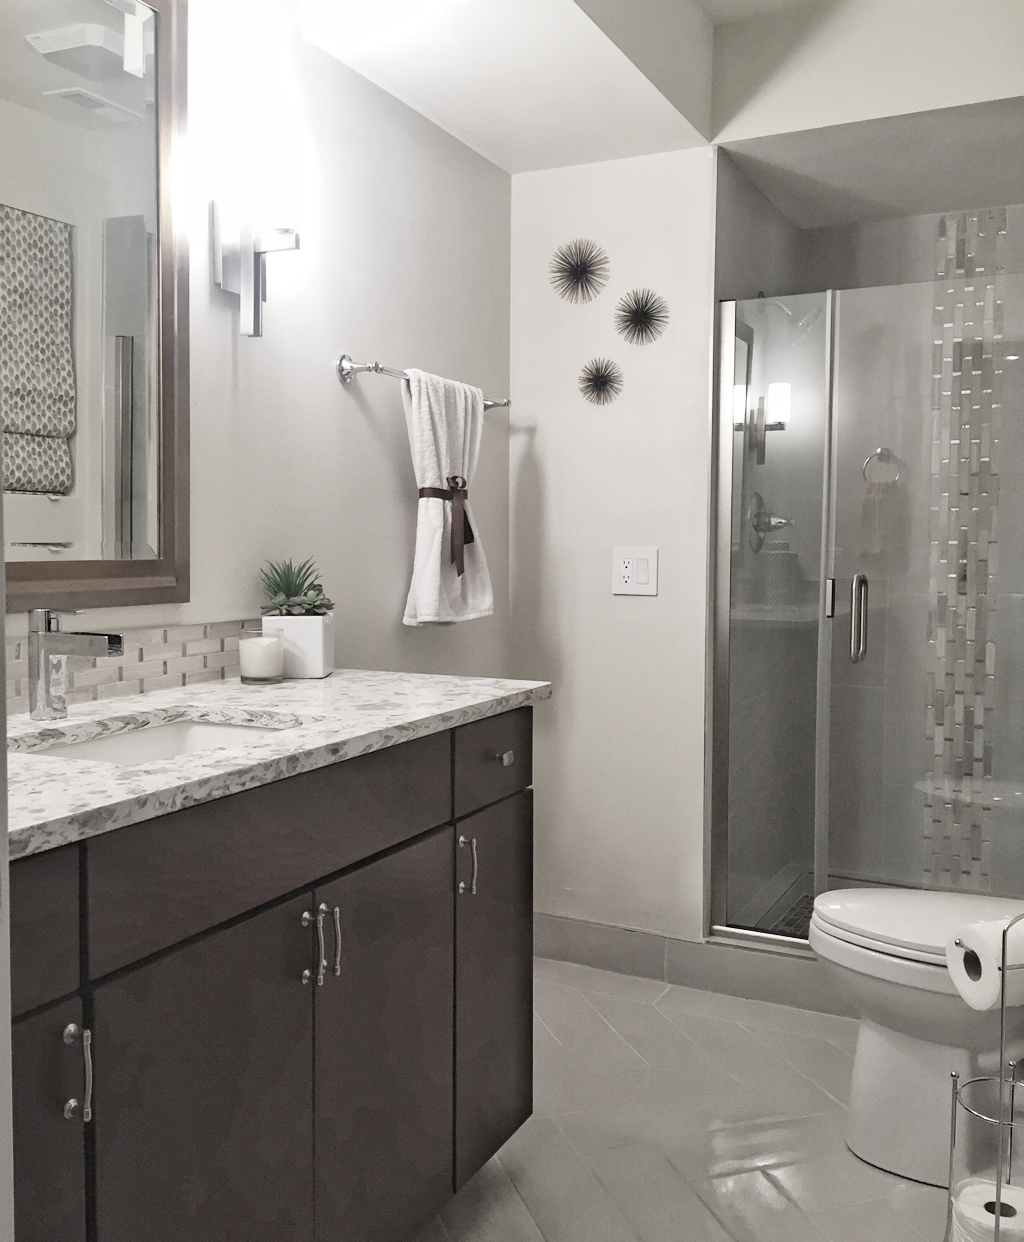 This is shorter than my previous home renovation entries but I hope you were able to get some inspiration from this blog just as much.
Our basement bathroom was completed about two years ago and we are looking to redo our laundry room next. A design concept has already been done - now we just need to secure the materials and get to work! Stay tuned for that entry! Where we got our items:
~ XOXO, Mari
0 Comments
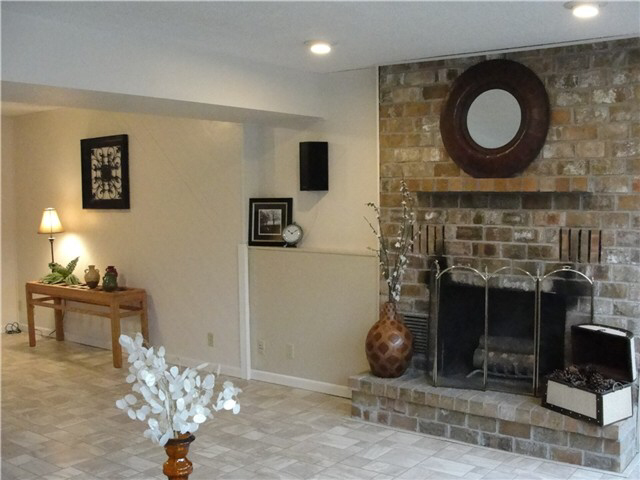
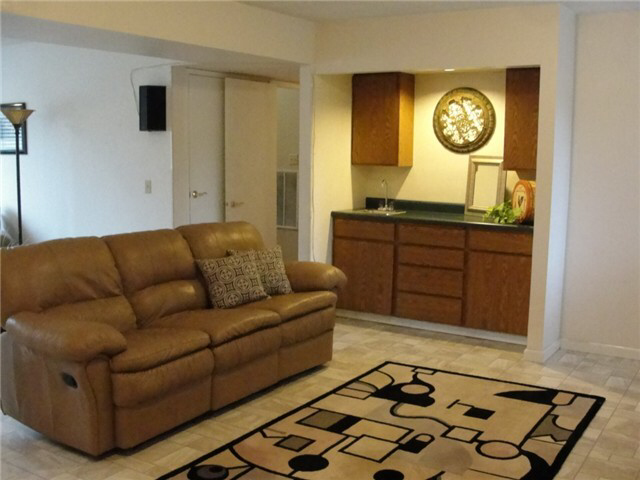
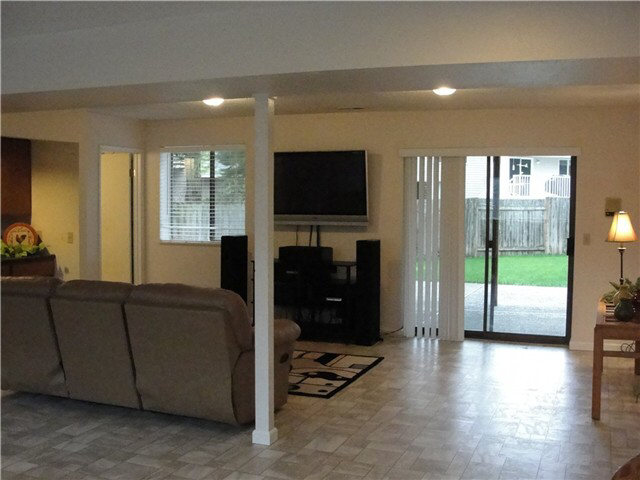
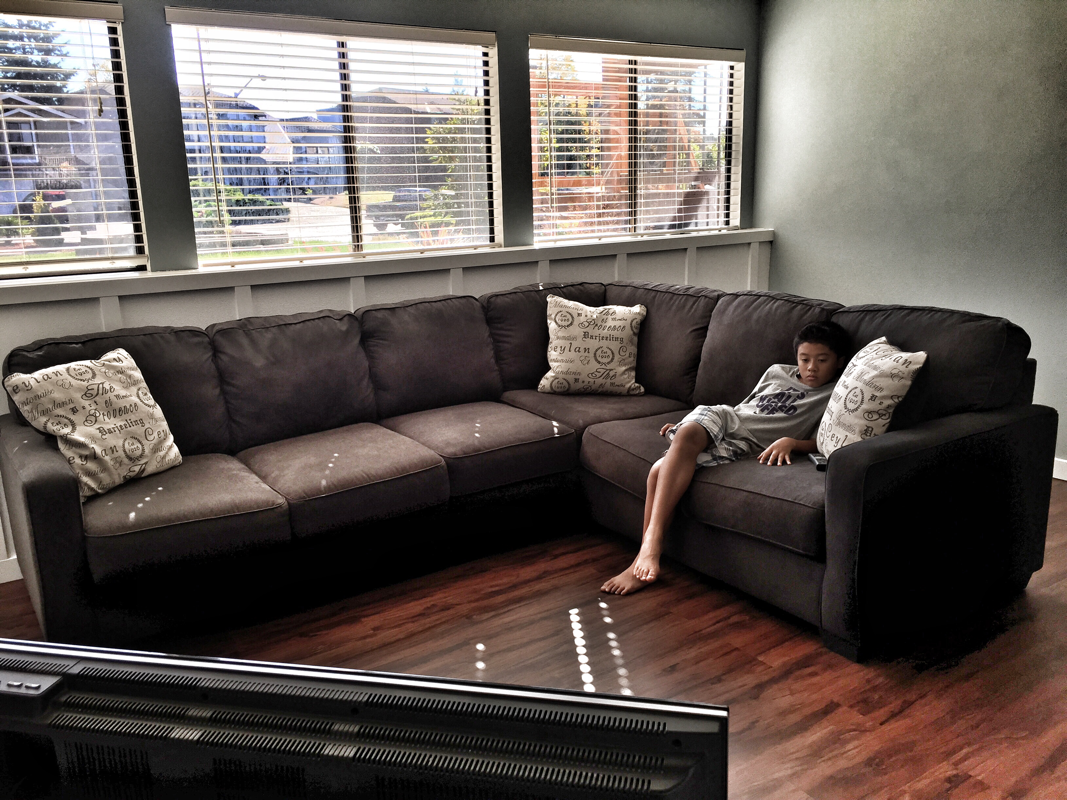
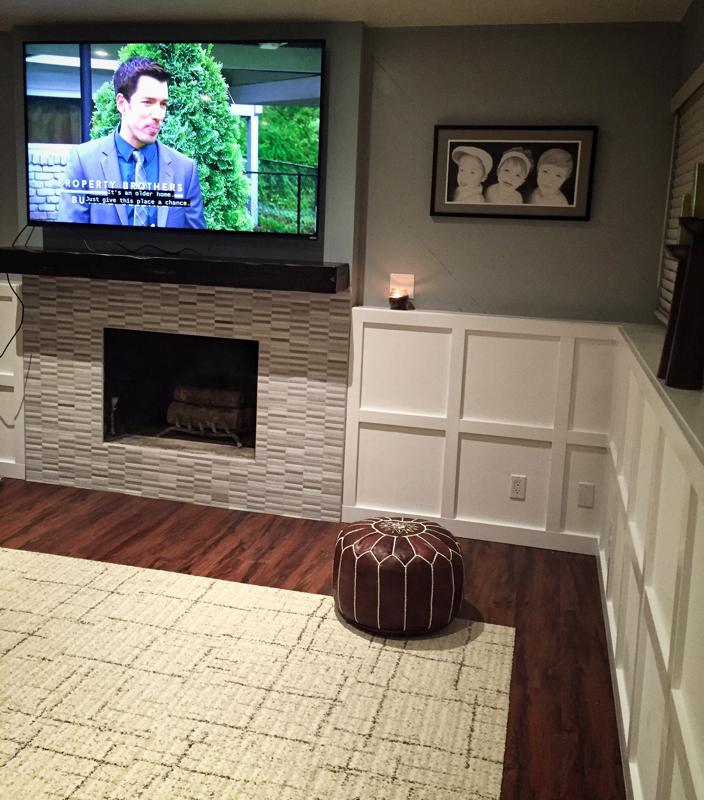
BASEMENT (Family Room • Office • Bar)Our basement was once occupied by my brother-in-law and, when he moved, we felt it was the right time to start renovations. I absolutely hated going downstairs and only really went when it came to doing our laundry. Spiders of all sizes occupied every nook and cranny. The place was filled with our unopened moving boxes and made it seem dark. The place always smelled dank and musty (even before we moved in). Surely this would’ve turned away a lot of homebuyers - as it did for Vuong - but I saw the potential. 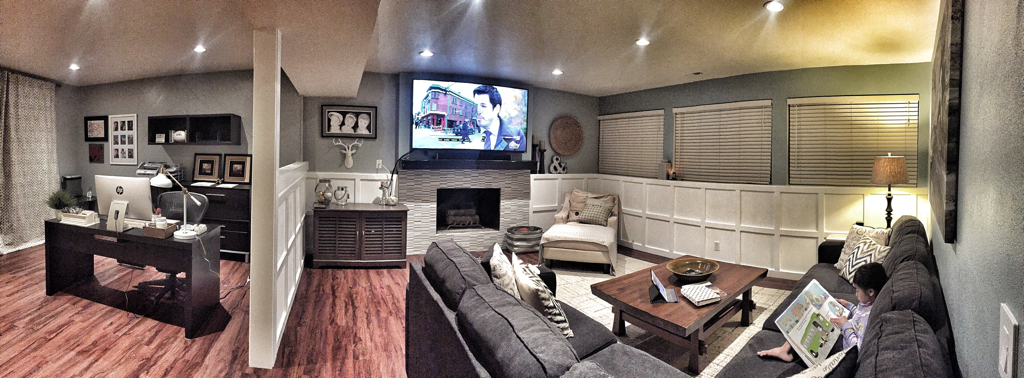 Vuong and I decided that our basement would need to be redone on a budget. We didn’t want too many costly materials in case of flooding. With hired contractors, however, we worked on some of it ourselves to keep costs down. BEFOREWhen we toured the house, whoever staged the basement did a decent job in making the space appear open, bright, and fresh (though I still thought it smelled a little like gym socks). Many areas of the basement had wallpaper - not the stylish kind we have nowadays but the dated kind that (we think) might have been applied in the early 80s. Design ConceptImmediately I went to work on the re-design. Vuong really didn’t know what he wanted but he envisioned a design similar to that of a 90's bachelor pad because it looked "clean, modern, and simple." Uh no...not if I could help it. I wanted simple as well but with some punch. The "punch" I envisioned came with architectural detail and some color. I played with color options and furniture layouts while working on my design...ultimately, we ended up going in a slightly different design direction but it still remained close to what we both wanted the space to be. The furniture in the space were just pieces I dropped from the design library and not actual store pieces we had our eye on. The office furniture from IKEA, however, was something we already had that I incorporated into the design. Also, the coffee table in the design was made to the measurements of our existing piece. The video below walks you through our finished space as if you were there. Pretty close to reality guys! When showing Vuong and our kids what our basement could look like, they were pretty wowed by it. :) DEMO & INSTALLATIONAs you'll see in the slideshow below, it truly was a team effort. Even my kids helped with the demo and installation:
If you read our previous blog entries on our upstairs, you may notice that the doors don't match what we installed in the basement (if you didn't know, now you know!). We installed 5-panel doors upstairs but the 3-panel ones were readily available. Since we needed them ASAP (and for a great price), we bought them. Painting them black helped them "blend" in with the doors upstairs. To this day NO ONE has noticed (or at least I don't think anyone has). Vinyl plank flooring was an inexpensive option. It worked best for both our economic needs and the basement sub floor. Also, we were told we could simply lay it over the existing vinyl and that it was an easy install. Though it isn't hand-scraped like the upstairs hardwood, we did a color match as close as we could so that, like the doors, the difference wouldn't be as obvious. VENDORS & SUPPLIERS
It took about 6 weeks or so to get everything cleaned up, demo'd, and installed. Now the fun part was about to begin - the DECORATING!!! Furniture & DecorWe used a lot of the same pieces from our last house. I wanted to replace everything with lighter-colored furniture but Vuong said "NO!" Other pieces we kept were framed artwork, our filing cabinet, coffee table, chaise lounge and bookcase. We wanted the furniture to have clean lines yet look comfortable. The only color I wanted was on the walls (pale blue and light bluish-gray wall colors) with neutral furniture pieces (creams, whites, and grays). All throughout our house, we chose blue as the main color to help us stay calm. New items we bought:
AFTERIn the slideshow below, I added some before and after photos so you can see the transformation. All the hard work was worth it. Although it wasn't exact to my original concept, the whole design works and, in our opinion, turned out for the better. There are still some areas we should have taken care of at the start but we'll tackle it at a later time. This project was definitely a labor of love for us all. For what it was, the hard work was worth it in the end because not only do we get to enjoy it but our family and friends do too.
~ XOXO, Mari |

Meet MariWelcome to my blog where I share my inner thoughts on life and all things I love - beauty, home decor and design, amazing food, our family travels, and fashion! Archives
March 2021
|


 RSS Feed
|
|

|