The GOOD LIFE with M
  • Home
  • Beauty
    • Contact
  • Design
  • Good Eats
  • Travels
  • Life
  • Style
  • WORK WITH ME
  • Disclosure Policy
  • Privacy Policy and Terms & Conditions

YUMMY in my TUMMY


A place for all my restaurant reviews and recipes (either my own or other's)

Easy Avocado Spread/Dip - in 4 steps!

3/30/2020

2 Comments

 
Picture
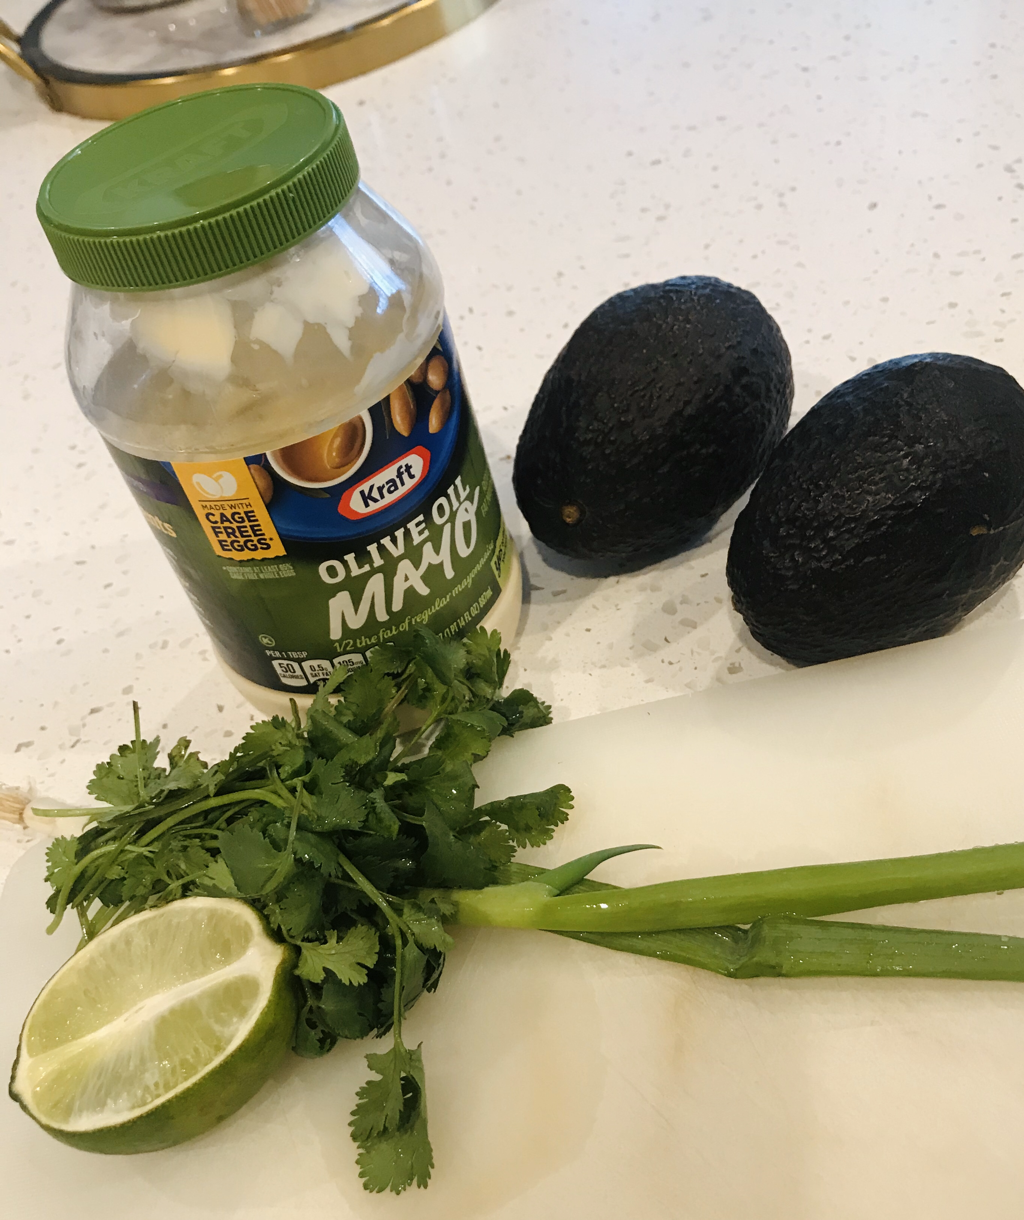
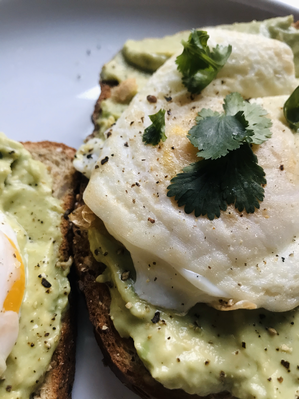
My tasty avocado spread!
So easy!  So tasteful!  You will be all over this spread - I PROMISE.  With the global quarantine in place, many of us have been staying home.  We have more time on our hands to try out new recipes or to prep more home-cooked meals.  We are (hopefully) eating healthier and are conscientious of what we're putting into our food.  One of my favorite healthy breakfasts include avocado and eggs.  While I could easily buy a jar of avocado spread (at least I think I can) to make my life easier, why not skip the preservatives and (maybe) extra sugar to make the spread from scratch?!  Well, look no further, because I have an easy recipe for you to try and even modify to make it your own!

INGREDIENTS
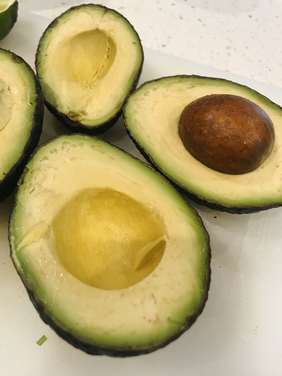
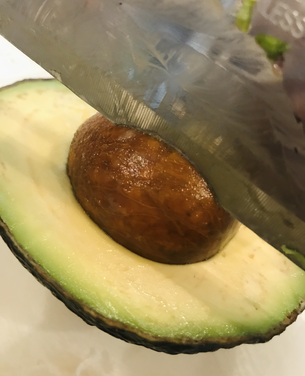
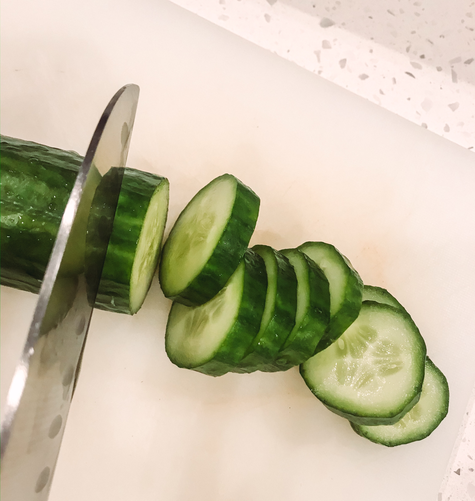
  • (2) ripe avocados
  • 4 tbs. Mayonnaise (you can use any - I used olive oil mayo since that's what I have)
  • 1/2 lime (about 1 tbsp) 
  • Cilantro - 1 bunch (about 1/4 cup)
  • Green Onion - 1 stalk
  • Garlic Powder 1/4 tsp 
  • Salt - to taste (use what you have but I like sea salt because it's tastier)
  • Pepper - to taste
Picture
Picture

Prep Time

About 20 minutes.  And the best part??  NO COOKING NECESSARY.  

Directions

1) Start off by chopping your cilantro and green onion and combine in a separate bowl.  Set aside for later.  
Picture
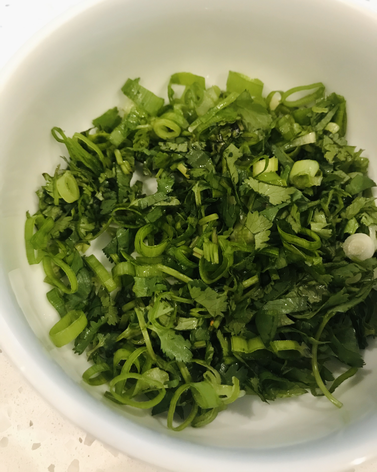
2) Cut each avocado in halves.  Remove seed by chopping into the middle (see 2nd photo) and twist to loosen from its place.  Discard (or for you garden aficionados - plant 'em)!  Scoop the avocado "meat" into a separate mixing bowl.
Picture
Picture
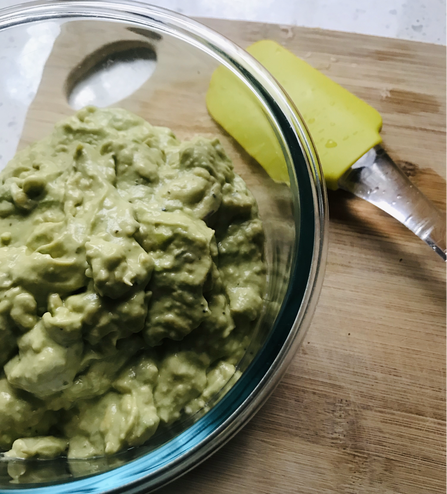
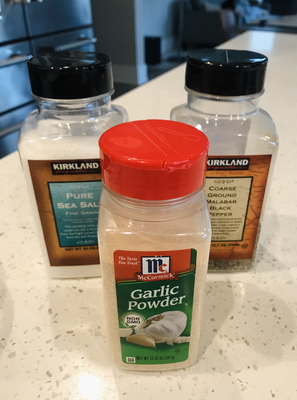
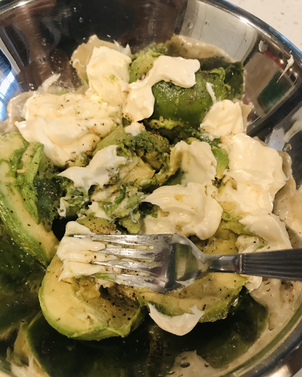
3) Add the lime, mayo, garlic powder, salt, and pepper and mix ingredients by smushing the ingredients with a fork.  The lime seems to act like a natural preservative while the mayo provides its creamy consistency.  This step takes about 3 - 5 mins...basically no time at all.  
Picture
Combine ingredients
Picture
Use a fork to mix ingredients
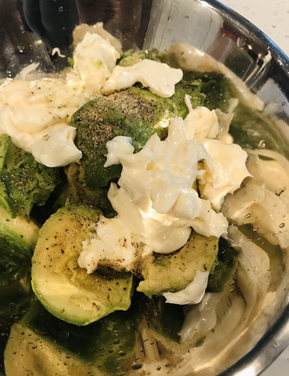
You should get a little something like this (the chunkier, the better)...
Picture
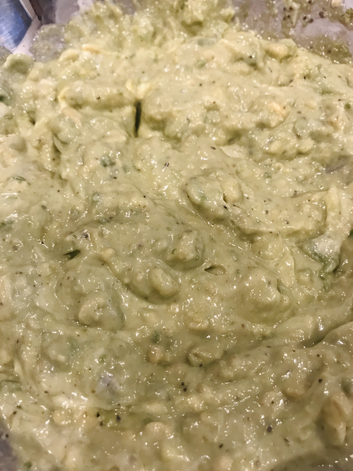
We like it CHUNKY!
4) Remember the cilantro/green onion mix that you set aside earlier?  Now you can add to the avocado mix.  Fold it in with a *spatula or spoon. 

​*TIP: I like to use a spatula because it helps to get every last bit when transferring from the mixing bowl into a container for later use.   
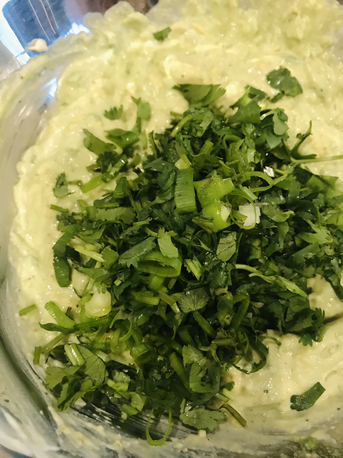
Picture
MIX IT!

For Later...

While you may not be able to consume the whole mixture in one meal, you can save for later.  However, I don't recommend saving the mixture for more than 5 days.  You can use a Tupperware container to keep it air-tight.  I like to use a glass container because I like to be able to see the mixture in case it goes bad before the 5 days are up (whereas most Tupperware containers have a cloudy appearance to them).    
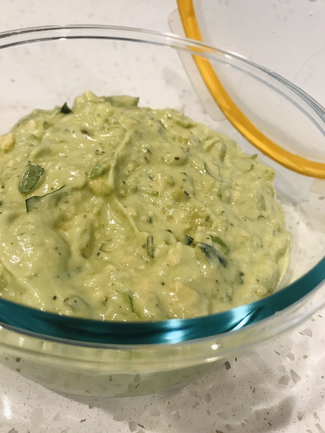
Picture

BON APETIT!

Picture
The best (and probably most popular) way to have this spread is on toast with an over-easy or poached egg on top (as seen in the photo).  I like to further season my egg with salt and pepper and garnish with dill or cilantro.  

My husband loves to have it as dip for crackers or veggie chips.  I sometimes place a dollop of it on top of scrambled eggs with chopped cherry or grape tomatoes on the side. 

I know it may sound gross, but I even have it by itself as a little snack.  I just take a spoon and go to town!  It's THAT good.  
Go ahead and try making this spread for yourself.  It's the best that I've tried and it's so easy.  Like I always say...the simpler the recipe, the better.  My husband, kids, and I have so much going on that it's a Godsend when I have recipes like these - especially if it helps us avoid microwaveable meals that aren't always healthy or filling. 

Tag me on instagram @mari_tran78 - I'd love to see what you create (whether it's my version or your own)!  Ciao and stay safe out there!   
~XOXO, Mari
2 Comments

Salmon-Cucumber Bites

3/12/2020

1 Comment

 
Picture
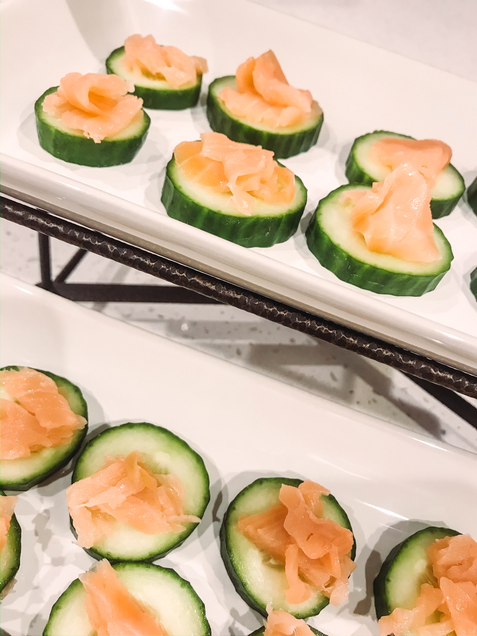
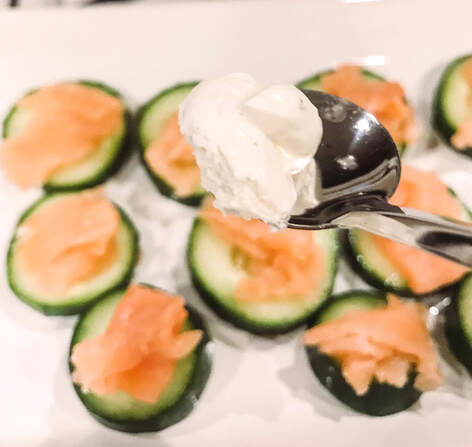
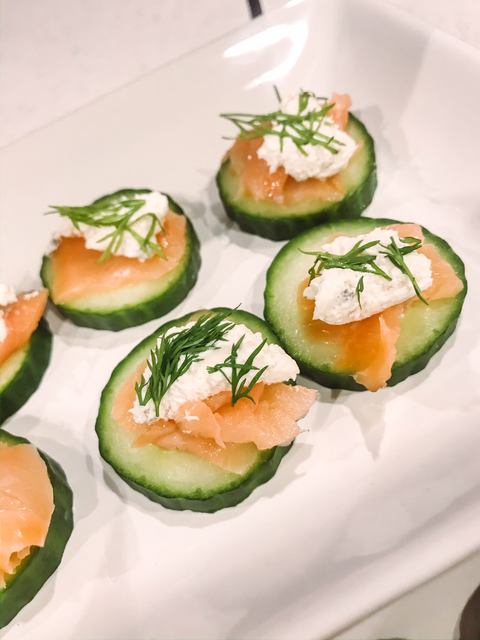
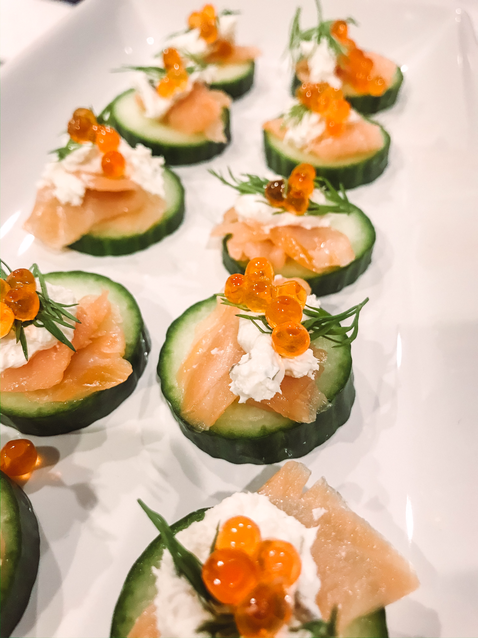
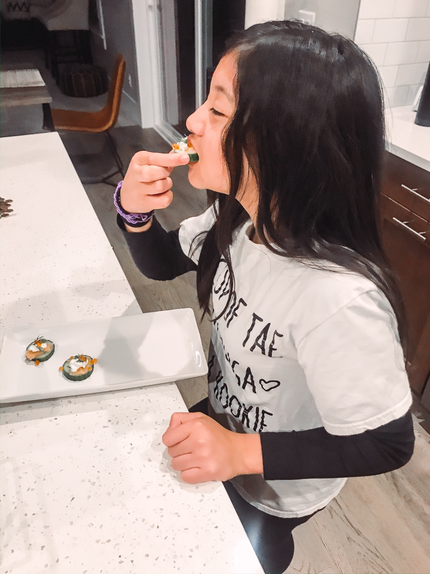
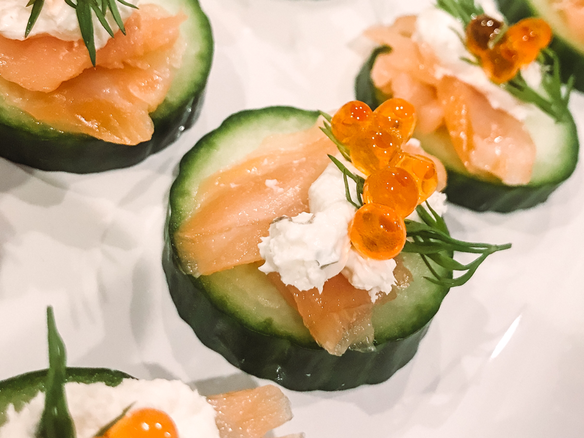
Salmon-Cucumber Bites

This is one of the easiest treats I have made and it’s low-carb, too!

Now, I can’t take all the credit...this was introduced to us by my sweet cousin, Jenn, at a tea party she hosted a couple months ago. My daughter loved them so much, she ate most of it and even got to bring some home!
Picture
Salmon Bites - 2nd/middle tier, left tower.
Picture
Savory & sweet bites galore!

INGREDIENTS

  • (1) cucumber (chopped) 🥒
  • (1) packet of smoked salmon (can use any)
  • Tub of whipped cream cheese (chive-flavored)
  • Jar of caviar (can use any but black tobikko is preferred)
  • ​fresh dill ​

TOOLS: Knife, chopping board, (2) small spoons OR piping bag
Picture
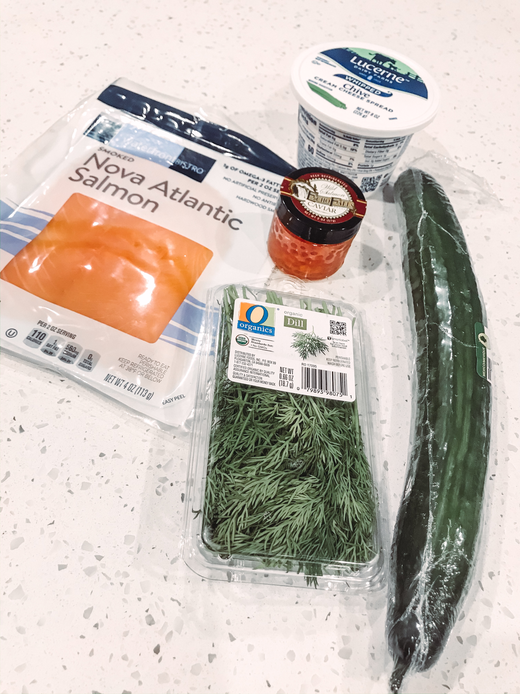
I bought everything at Safeway

Prep Time: 20 mins
Cook Time: NONE

Like all produce, make sure to wash well! I know I sound like a mom (because I literally am) but you’d be surprised how many people I’ve seen NOT wash their fruits or veggies before serving.

STEP #1: Chop your cucumber into chips! No need to peel the skin.
Picture
The cucumbers with ridges on the peel is the most flavorful.
STEP #2: Slice your smoked salmon into bite-sized strips. The salmon I bought, however, was so tender, I was able to tear them apart!

​Now, place a strip on each cucumber chip.
Picture
"Fold" the salmon on each chip
STEP #3: This is the most difficult step of them all - placing a dollop of cream cheese on top of the salmon. I used (2) small spoons to get it on as cleanly as possible - it gets difficult because the cream cheese loves to stick onto the spoons.

​I think a piping bag will help solve this issue. You can easily make one by taking a ziploc bag. Scoop about a cup of cream cheese into it, then snip off one of the bottom corners to easily squeeze it through. Not only will it be a clean process, but it’ll be much more presentable!

Adding the cream cheese provides a nice contrast to the salmon and gives it that "depth" that would be missing, otherwise.
Picture
Just a dollop of chive-flavored cheese cheese!
STEP #4: Take your fresh dill and garnish over the cream cheese. 
Picture
Ensure the dill is fresh and NOT the dried version!
STEP #5: Place caviar on top of the dill.

You can use any but I prefer the black tobikko that my cousin placed on top of hers. The black caviar provides a nice color contrast to the whole thing! I went to my neighborhood Safeway and they only sold the salmon (orange) fish eggs.
Picture
Presenting the salmon bites! So easy!

THE TASTE TEST...

My daughter loved it so much, she finished off a plate of her own!
Picture
Yummy yummy in her tummy!
This dish is so easy and would be perfect hors d'oeuvres served at any of your shindigs (pairs well with a nice Chardonnay or Pinot Grigio)!

I encourage you to give this simple recipe a try and let me know what you think!

~ XOXO, Mari
1 Comment
    Picture

    Meet Mari

    Welcome to my blog where I share my inner thoughts on life and all things I love - beauty, home decor and design, amazing food, our family travels, and fashion!  ​


    Archives

    March 2021
    February 2021
    January 2021
    December 2020
    March 2020
    January 2020
    February 2019
    December 2018
    November 2018
    October 2018
    May 2018
    February 2018
    January 2018
    November 2017
    July 2017

    RSS Feed

If you've got questions, I'D love to hear from you!

EMAIL

facesbym@hotmail.com
  • Home
  • Beauty
    • Contact
  • Design
  • Good Eats
  • Travels
  • Life
  • Style
  • WORK WITH ME
  • Disclosure Policy
  • Privacy Policy and Terms & Conditions

Picture
Picture
Picture